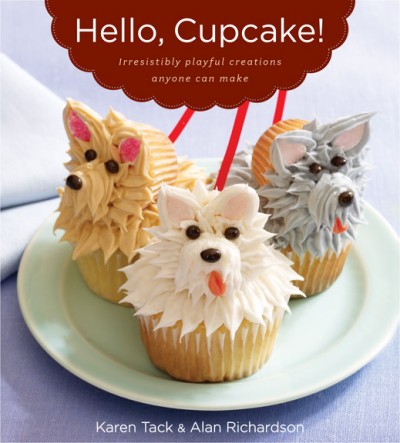
I have been the designated family birthday cake baker since I was 12. I’ve always loved decorating special cakes to match the recipient’s interests, the party theme, or even a specific gift. A few months ago some books about cupcakes caught my eye and I was fascinated by the creative ideas I saw as I flipped through the pages. The first book I found was Hello, Cupcake! by Karen Tack and Alan Richardson.
Cupcake cakes make frequent appearances on CakeWrecks.com, but this book had some beautiful examples, including a cupcake version of Van Gogh’s Starry Starry Night set out on an elaborate picture frame. There were unique icing ideas that I had never thought of, and best of all everything was explained with full color photography and simple instructions.
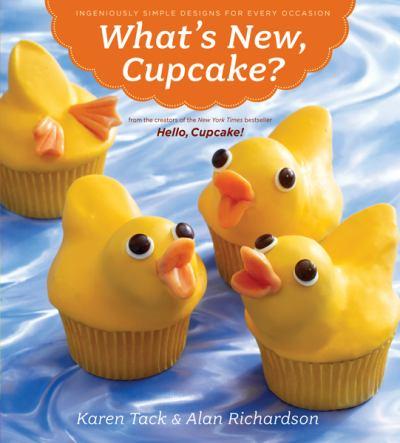
Then I discovered that there is a sequel: What’s New, Cupcake? The second book has even more clever and adorable cupcake designs, but the projects are a little bit easier and utilize readily available ingredients (unless you live in consumer hell, like I do, and have Walmart and one grocery store to choose between…but I digress).
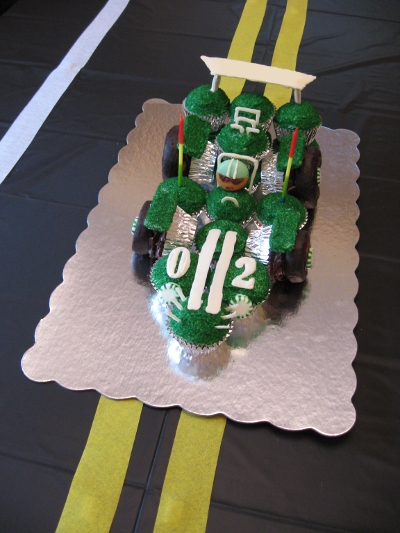
Flipping through this book I found a racecar cupcake cake that I immediately fell in love with. Since Mr. Boy’s birthday was coming up and he has an obsession with all things that go, I knew that I had to give it a try. I didn’t know whether I really wanted to fork over $15 for a book that I would likely use for just that one project, but I ended up buying it and I’m so glad I did!
I baked the cupcakes the night before Mr. Boy’s birthday. The book includes instructions to improve regular cake mix by adding buttermilk and an extra egg. It really thickens up the batter and makes it taste richer (I had to test it, of course). The racecar required 19 cupcakes.
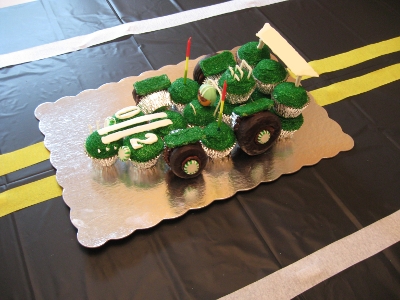
I started decorating as soon as I woke up the next day, which was a good thing because it took a while! Although I loved the red color scheme used in the book, my sister is severely allergic to Red 40, so I needed to make something that she could eat. I decided to go with green. I couldn’t find green cupcake liners at any of many stores I searched, so I went with foil instead. I was a bit discouraged that I had to stray from the design in the book, but I soldiered on. I also purchased white candy melts, Nilla wafers, pretzel sticks, two different sizes of chocolate frosted donuts, graham crackers, and some mint candies. This cupcake cake was not going to be cheap, but I felt that it would be worth it.
And it WAS:
I was beyond happy with the end result!
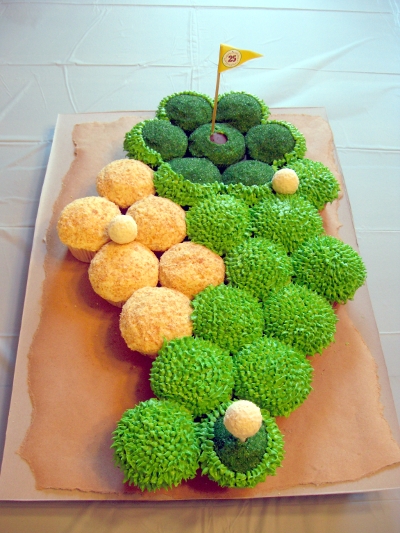
Everyone at the party was impressed, and the book itself made a great conversation piece. My brother’s girlfriend enlisted me to make a cupcake cake for my brother’s birthday. He is an assistant superintendent at a golf course and generally obsessed with golf, golf courses and turf, so it was obvious that he had to have this cake:
It was a big hit (no pun intended), and I was once again very happy with the result.
If you need some unique cupcake ideas for a party or just because, I definitely recommend checking out both of these books! Many of the projects are very simple, but I never would have thought of them on my own. Best of all, you don’t need any special equipment to make these projects. In fact, the authors recommend using Ziploc bags with snipped off corners instead of pastry bags (a trick I have been using for years, and it really works). After making two cupcake cakes from What’s New, Cupcake?, here are a few tips:
– Don’t be afraid to improvise and change colors or flavors to suit your taste. You might be pleasantly surprised by the result.
– Professional bakers, especially those who enter baking competitions, like to make every last element edible. Some of these projects involve a LOT of parts and pieces, and you may need to purchase a specific type of candy just to use one piece. Consider using inedible (but food safe) items like toothpicks, wood skewers, etc. instead.
– If you do purchase lots of different candies, cookies, donuts, pretzels, etc. as I did to make the racecar cake, consider setting the extras out as snacks at the party.
– Don’t allow yourself to feel discouraged as you’re working on the project. Wait until it’s all put together! I felt like the racecar was going to be a disaster until I started assembling it. Once all of those individual cupcakes are assembled together, the end result will be adorable!
– If you need to stack cupcakes on top of one another, insert wooden cake testers or a piece of skewer through the center of the cupcakes to keep them in place. This wasn’t mentioned in the book, but it really helped when assembling the race car.
– If your project requires parts made from candy melts, trace each part several times so you can pick the best ones, or in case one breaks. Working with the melted candy was the trickiest part of the racecar project for me.
I had such a fun time putting both of these projects together, and I can’t wait for an excuse to make more cupcakes!
DISCLOSURE (what’s this?): This post contains affiliate links to products on Amazon.com. I receive a small percentage of the purchase price of products purchased through these links. I was not asked to review these books.

Hi I was thinking about makin a golf course cupcake for my dad on fathers day and just came across yours and fell in love with it. I was just wondering what tip you used for the green grass?
Thanks for visiting, Katherine! The book actually shows you how to snip the end of a ziploc bag with scissors to create various “tips”. For the golf course cupcakes I just snipped off the end – there was no special shape. You squeeze a little bit of frosting out, then pull back to create the spiked look. It was a little bit time consuming to do all of the grass, but it was worth it. Hope that helps – I’m terrible at explaining these things 🙂
gostei muito e estou querendo abrir um empreedimento só de cupcake
what did you use for the brown on the cupcakes?
Hi Maria,
If I remember correctly, I used crushed Nilla Wafer cookies for the sand. You could also use graham cracker crumbs