“Gleaming hardwood floors” sound great in real estate listings, but the reality of trying to keep them in good condition with kids, pets, and Central New York weather can prove stressful. Our 1918 home features a spacious foyer, but its wall-to-wall hardwood isn’t the most practical floor covering for a busy entryway. Through the years I’ve tried various waterproof mats and rugs, but struggled to find something that provided sufficient protection and was easy to keep clean.
After brainstorming various options that would have required either removing some of the wood floor or damaging it to apply a new surface over the top, I found companies offering vinyl rugs that looked like vintage tile. The problem? They cost hundreds of dollars and the sizes didn’t quite match the layout of my space. A custom rug would be even more expensive.
I found that multiple companies manufacture “penny tile” sheet vinyl flooring (note to manufacturers: you should do more of this–people love the vintage look!), and I got to thinking that maybe I could make my own “rug.” Maybe I wouldn’t even have to worry about finishing the edges, or anything…just cut to fit and see how I liked it.
I headed to Lowes to see what my options were in the floor remnant section, and they just happened to have an 8’x12′ remnant in a small hex tile pattern. I wasn’t crazy about the black, but the style was period appropriate for my house, and there wasn’t anything in stock that I liked better, so I decided to give it a try.
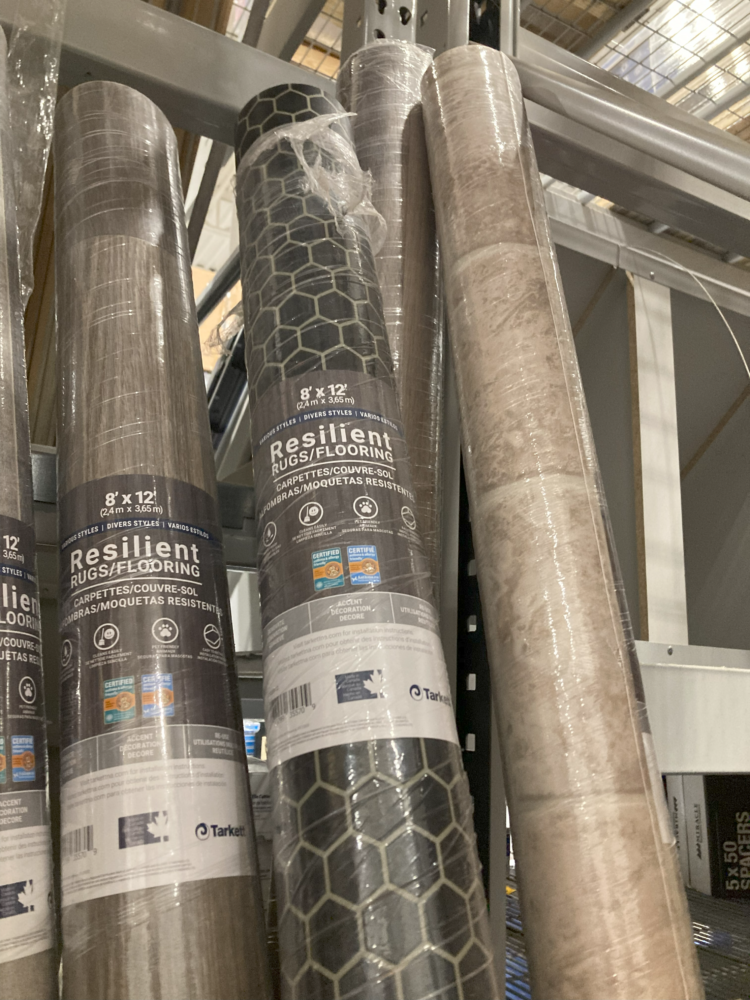
Originally I was going to do wall-to-wall, butting right up against the trim. I considered removing and reinstalling the quarter round molding to keep the vinyl in place. But an unfortunate mismeasurement (“Measure twice, cut once? Who, me?”) meant that I cut the sheet too small. I decided to go with it and cut a smaller L-shape tailored to my space so the rug would look more like a tile inlay in the larger floor, with a portion that jutted out to meet up with the entry door.
I wasn’t loving the “just” black, though. Yes, it was “hex tile” that was period appropriate for my house, but the overall effect reminded me of an industrial rubber mat. So being the little bit “extra” that I am, I decided to add “accent tiles” with paint.
I hate it when I’m in Lowes and the employees ask if I need help, because I am invariably up to something that shouldn’t really be done. Expecting any kind of off-the-shelf paint to adhere to a high-traffic vinyl floor is one such thing. In the end, after dismissing a friendly employee with an “I’m all set, thank you,” and deliberating so long that I seemed anything but “all set,” I decided to try Zinsser Perma-White in satin, which I’d used on a different sort of project previously and knew it could stand up to some abuse.
Yes, I’m crazy enough that I considered hand painting each tile with a little brush, but I thought stenciling might go a bit quicker. I used stencil blanks to create my own stencils for “flower” shapes and a border around the edges of my rug. I found a website somewhere that could generate a grid of hex shapes (after counting along the edges of my rug–ugh!), and then spent a little bit of trial and error and maths figuring out a pattern that was more or less evenly spaced. I penciled small “X” marks on the vinyl where the white tiles needed to be.
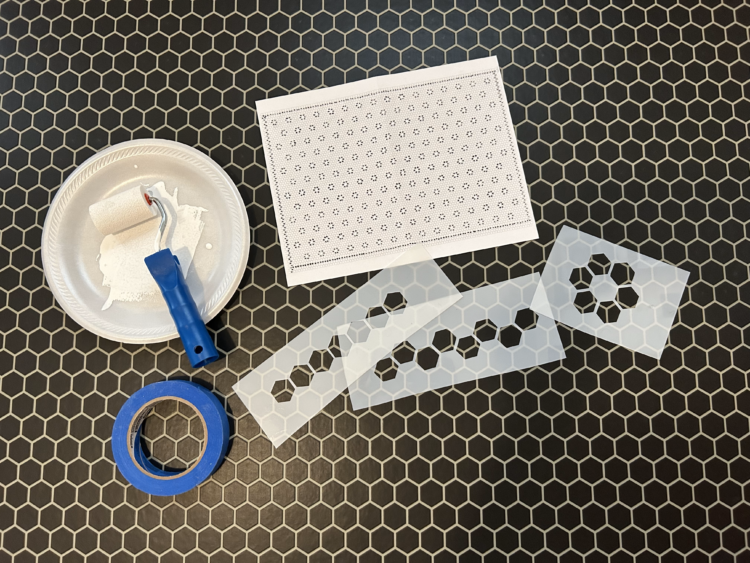
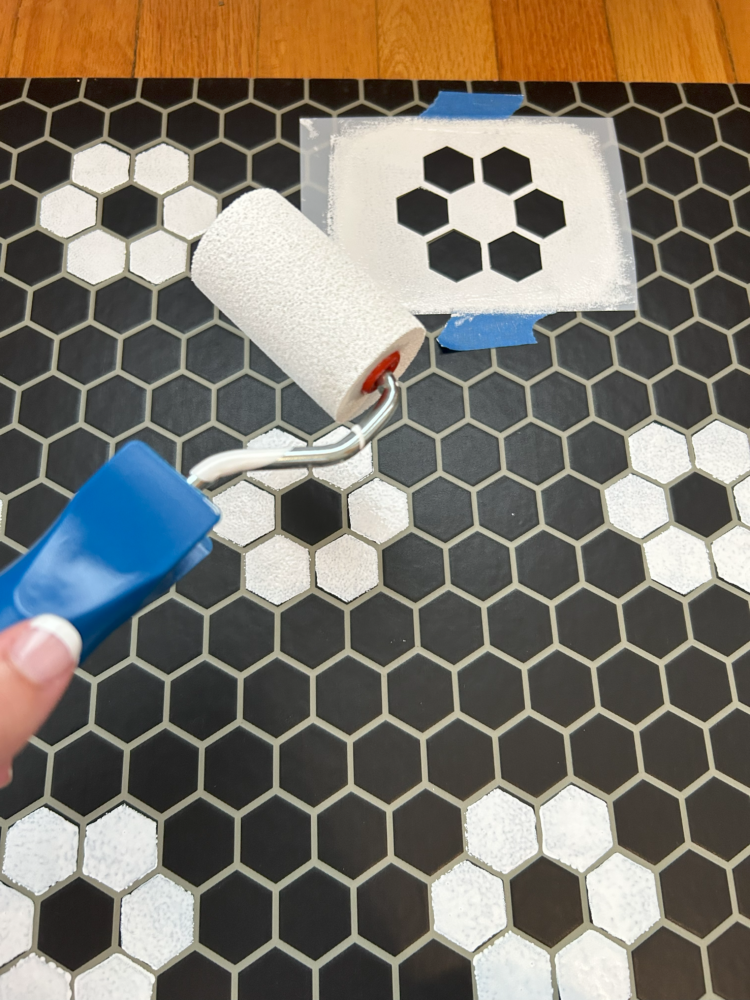
I used a foam roller and my stencils and did just one good coat of paint–all I had the patience and the willingness to cripple my muscles for–to create my tile pattern. I figured if the paint didn’t work out long term, I could always redo it or just abandon this idea altogether.
In the end I was quite pleased with the result, and it fits in with the period and character of my home. Up close it doesn’t fool anyone, but at a glance most visitors assume it’s tile.
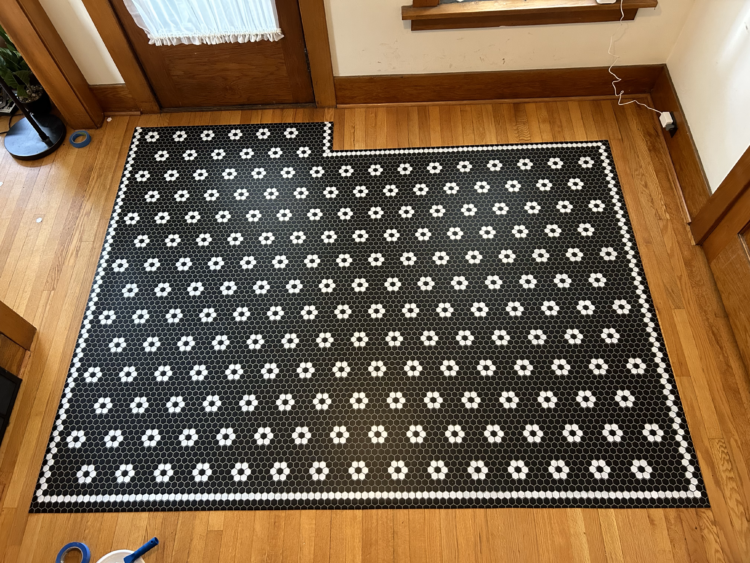
I completed this project in August 2023, and now in the midst of winter (January 2024), it’s doing just what I’d hoped. There’s plenty of space for our family to come in from the weather and remove wet, slushy boots without trying to balance on smaller water proof mats. Best of all, I’ve been able to sweep and mop the mat without damaging the paint, and it seems none the worse for wear after daily foot traffic.
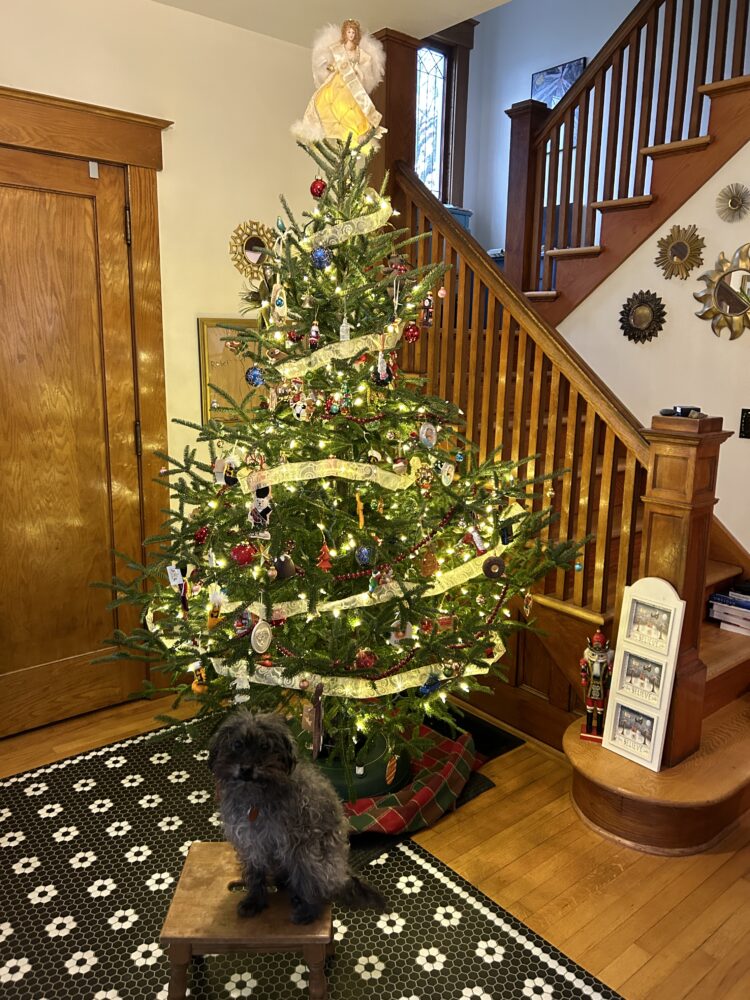
The vinyl is not adhered to the floor in any way (this was important to me), but it stays in place quite well and the edges don’t try to curl up. Periodically I lift up the rug to clean underneath, because dirt still finds a way of migrating beneath, but it’s large enough that water has stayed off the wood like I’d hoped.
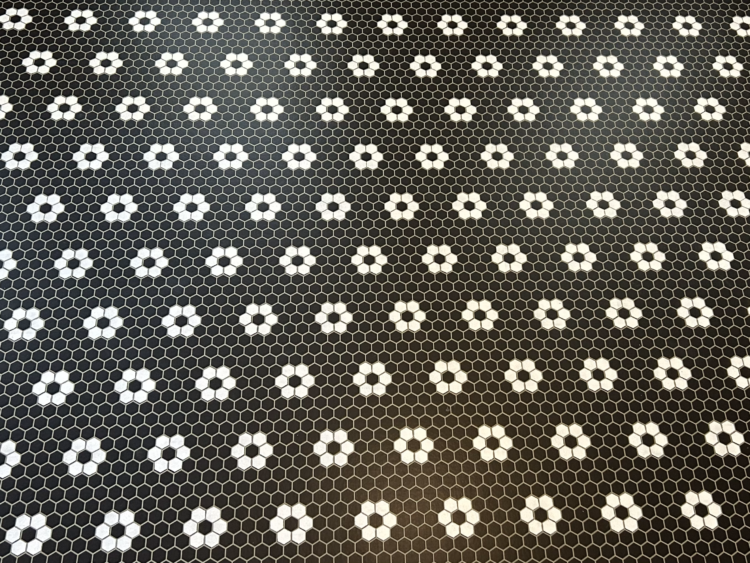
Similar ready-made rugs cost hundreds of dollars, but my waterproof vinyl floor rug with a custom vintage penny tile look came in under $70 including the remnant and all of the supplies!

Did you put anything under the rug to keep it from slipping? Also did you use any kind of sealer on the paint?
No, I didn’t put anything underneath. It stays in place very well. I also didn’t use any kind of sealant. It is still going strong to this day!