After we bought our current home, we discovered that our next door neighbor happens to be my mom’s cousin’s son (what’s the proper term for that? I have no idea). I also happened to grow up down the road from him, so it was a neat coincidence.
What wasn’t so neat, though, was the view through our dining room window. Our neighbors are great, but staring at their roof every day? Not so much.
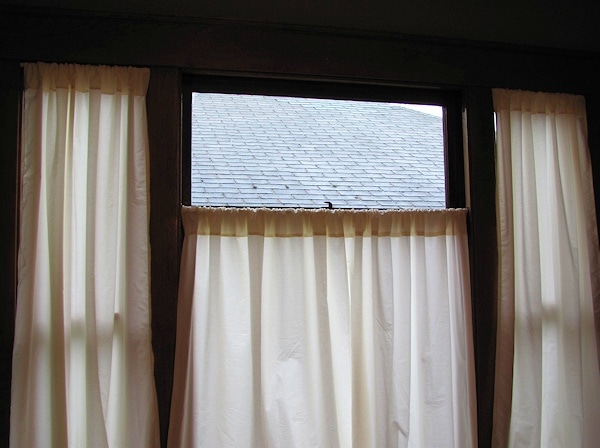
Our home has two beautiful leaded glass windows, and the small top window in our dining room looked like a prime location for more leaded glass, but it was just plain. I presume that’s because the window below used to be operational, and the motion would have shattered a fragile leaded glass window.
I looked into a few different options to obscure the view in a way that looked nice from inside. Of course I could have covered it with curtains, but I wanted to highlight what little architectural interest there was in that location. Window film is pricey, and the stained glass or leaded glass styles that I preferred didn’t come in a suitable size, nor did they match the character of my home. Real leaded glass was prohibitively expensive.
I didn’t want to invest too much money because, eventually, we will be replacing these drafty old windows anyway. I wondered if I could somehow fake leaded glass, but I wasn’t sure what kind of materials I could use.
Finally, I happened to find a tutorial showing how to use Plaid brand Gallery Glass products to create very convincing faux leaded glass. The project was inexpensive and easier than I expected. For less than $20 and with a few hours of work, I was able to create a beautiful window design that obscures the “scenery” outside and flows well with the original details in my 1918 home.
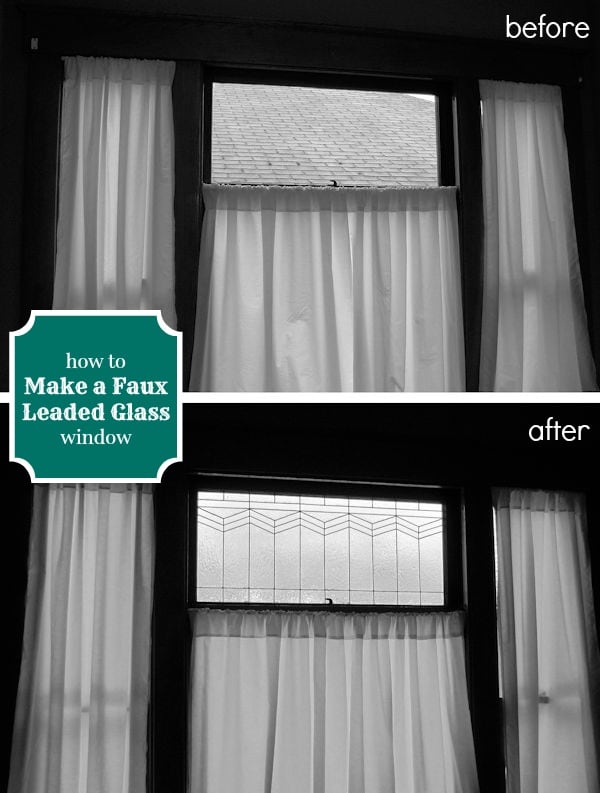
I thought I’d walk you through the steps in detail in case you want to give it a try — I bet you’ll be looking for any excuse to try it once you see how easy it is. My husband says he’s expecting to come home to Sainte-Chapelle one of these days.
Materials
Plaid Gallery Glass products are easy to find in major craft stores or online. I used the following products for my window, which is approximately 38 inches wide by 16 inches high:
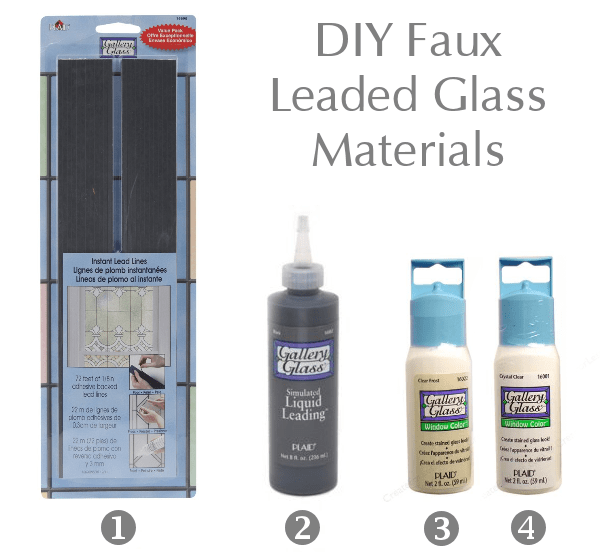
1. Gallery Glass Redi-Lead Instant Lead Lines Value Pack 2. Gallery Glass Liquid Leading 3. Gallery Glass Window Color in Clear Frost 4. Gallery Glass Window Color in Crystal Clear
The leading strips were the most expensive item on the supply list, but I was able to spend less by using one of the ubiquitous 40% coupons that stores like Jo-Ann, Hobby Lobby and Michaels offer regularly. I purchased one value pack of leading strips, one 2-fl. oz. bottle of Liquid Leading, one 2-fl. oz. bottle of Clear Frost paint and two 2-fl. oz. bottles of Crystal Clear for just under $20 at Hobby Lobby (Note: I’m linking to Amazon in this post, but check out craft stores first if you can — the in-store prices are much better, especially with a coupon).
Gallery Glass window paint comes in a wide variety of other colors as well if you want to create a faux stained glass look.
In addition to these supplies, I also used a utility knife to cut the leading strips, a ruler, a measuring tape, a small paint brush and some q-tips, all of which I already had on hand.
Note: I had a good question from a reader and wanted to clarify in case anyone else is wondering. The leading strips mentioned above do not contain any real lead, and they are completely safe to handle.
Step 1: Develop a Design
I wanted my new window to match the styles of the two existing leaded glass windows in my house.
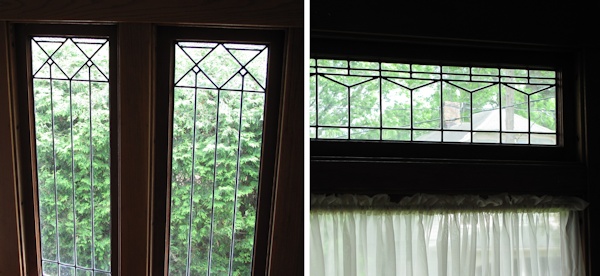
I searched online to find other examples of leaded glass from the time period, and found one particular design that had many of the same elements, but was a little bit more ornate.
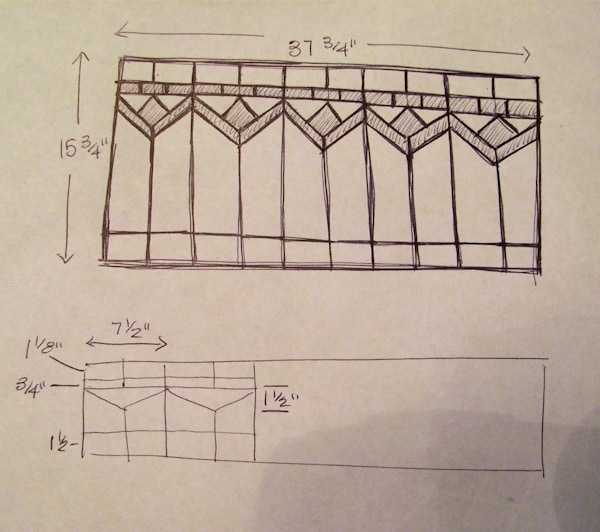
I sketched the proposed design, and then sketched the existing window I have in my living room to get some proportions. I ended up simplifying my proposed design quite a bit after I started applying the design to the actual window — it proved a little bit too elaborate, and I didn’t care for the look. I decided in this case that less is more.
Step 2: Measure and Apply Leading Strips
First, I cleaned the window thoroughly with window cleaner to ensure that the materials would adhere properly. Once I had developed my design and worked out the dimensions, I began to cut pieces of flexible faux leading strips and apply them to the window. There wasn’t an easy way to transfer the pattern to the window, so I used lengths of line segments and points as a guide.
I ran into a small problem almost immediately — after applying four horizontal line segments at the top of the window, the fifth section didn’t fit. Had I measured incorrectly? I was scratching my head for a while until I realized that the strips had stretched a bit as I pulled them off the backing. From then on I measured, cut, applied the strips, and then re-measured and used a utility knife to trim off the excess. I was back in business.
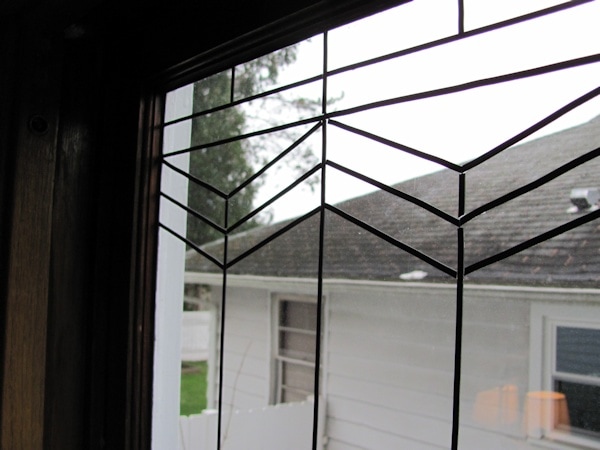
The leading strips are very easy to use, and can be removed and re-positioned if needed.
Step 3: “Solder” Joints with Liquid Leading
Once all of the leading strips were applied to the window, I used Liquid Leading to fill in the gaps.
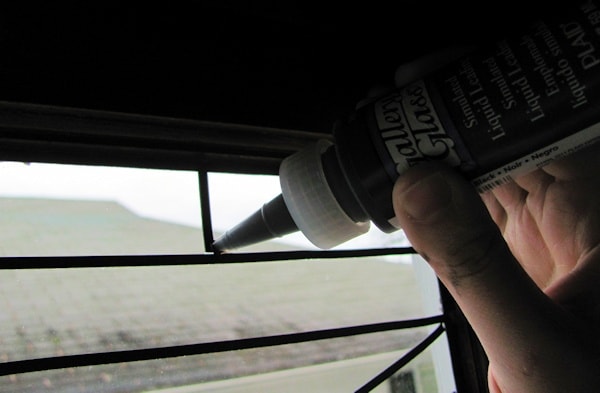
It’s similar in consistency to fabric puffy paint and really lends an authentic look to the leading work. Allow it to dry completely before proceeding.
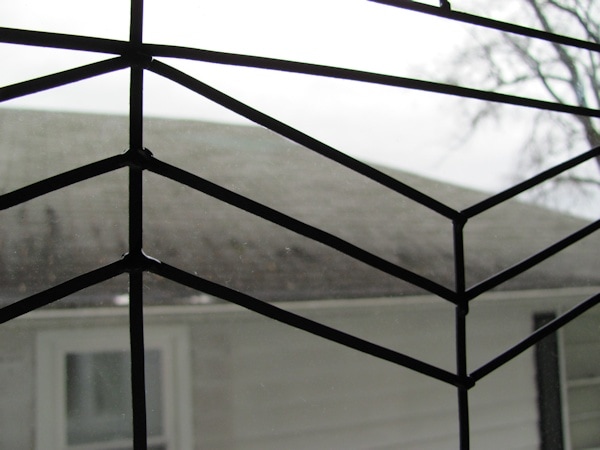
Step 4: Apply Frosted Glass
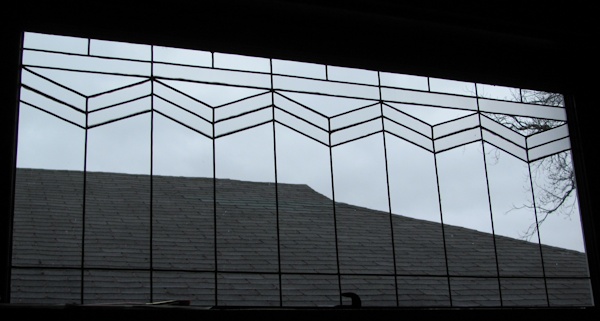
I thought it would be nice to use different textures on my window, so I decided to use a mix of frosted glass and pebbled glass. I used Gallery Glass in Clear Frost to paint the flower portions of my design. I wanted the frosted sections to be smooth, so I used a paint brush to apply. If you look closely you can see brush strokes, but from a distance it does look like smooth frosted glass.
Step 5: Apply Pebbled Glass
The bulk of the project was filling in the textured glass portions, for which I used Gallery Glass in Crystal Clear. There are different ways to achieve texture. The instructions suggest using the tip of the paint bottle to swirl the paint around, but the examples I saw weren’t exactly the look I was going for. I ended up using my finger to blot the paint after spreading a thin layer over each pane, which created a fairly uniform texture in keeping with the real glass in one of my original windows.
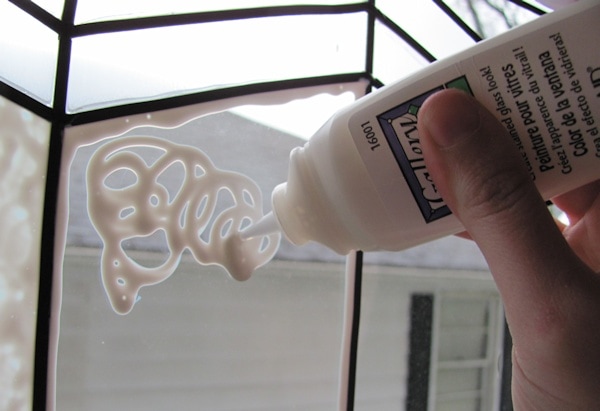
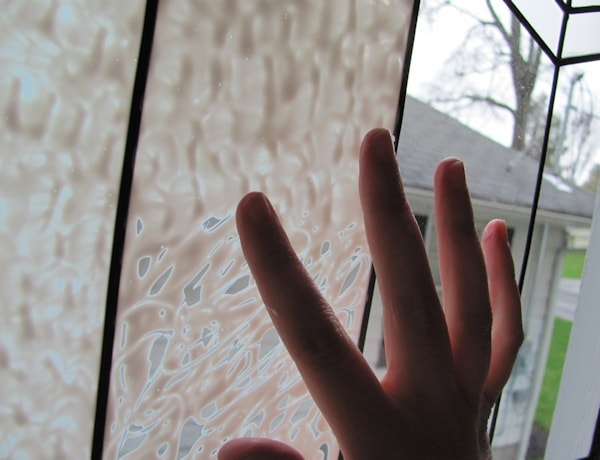
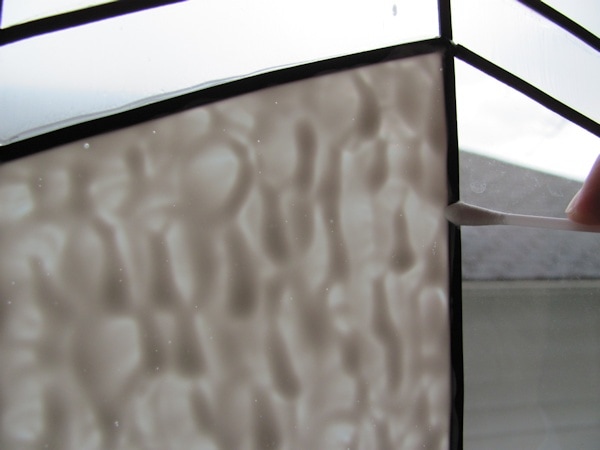
Working on a vertical surface was a little bit tricky. If I used too much paint, it would flow down the window and make a mess. It took a little trial and error to determine the right amount, and I learned not to bother outlining the bottom edges of the window panes. Although the paint dries completely clear, I didn’t want the leading strips to look shiny, so I went through with q-tips to clean up the lines before the paint dried.
Step 6: Allow to Dry
Drying time varies depending on how thickly the paint has been applied. My frosted glass sections dried very quickly. The clear textured glass began to dry quickly, but the thicker areas took several hours. The paint is similar to glue — it starts out white and then clears as it dries. In the picture below, the paint on the left has been drying for several hours, while the paint on the right is fresh. The thickest areas take the longest to clear.
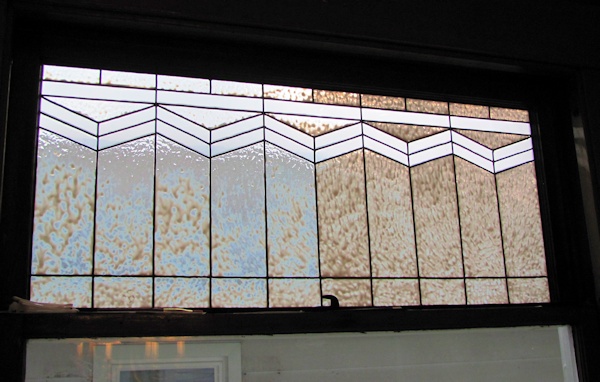
Once dry, I was amazed at how authentic the window looks. It adds beautiful character to the room and does the job of obscuring the not-so-nice view we had before.
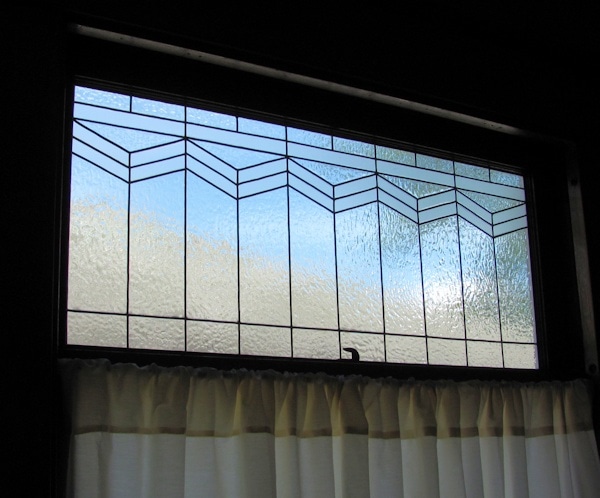
It appears a little less authentic from outside, since it doesn’t have the texture of a real leaded glass window, but it still looks very attractive.
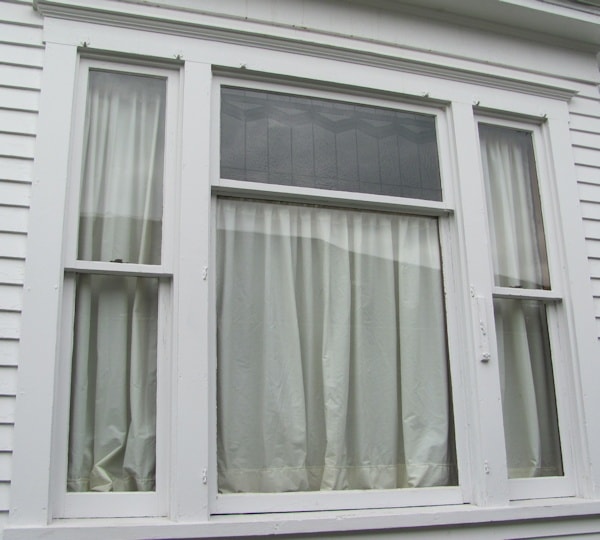
One little problem I’ve noticed is that on very rainy days my clear paint will cloud up a bit due to the moisture. I guess my windows are not sealed well. Not to worry, though — it clears right back up as soon as the moisture is gone. This is a known issue with Gallery Glass, and something to be aware of if you want to use the products in a humid area (like a bathroom).
If you’d like to add some historical character to your home, these Gallery Glass products are a great way to create convincing faux leaded glass. So often cheap solutions look just that, cheap. This really works, and I think it looks infinitely better than ready-made window film.
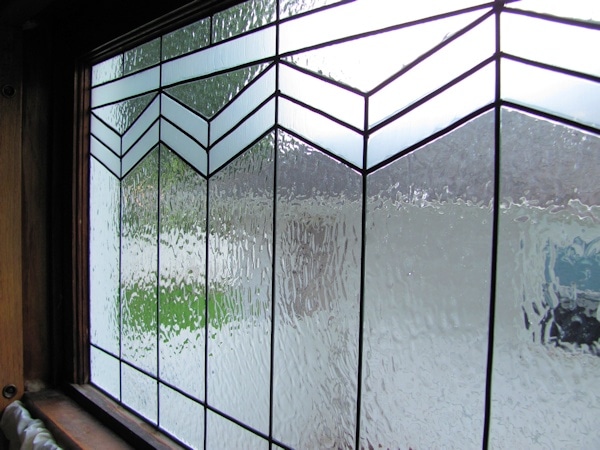
If you get sick of the look, or just need to remove it for some reason (maybe you’re renting), the paint is completely removable — it peels off just like window film once it has cured. If you make a mistake, you can cut out one section and try again. It’s very user-friendly, cleans up with soap and water, and doesn’t give off noxious fumes.
I’m so excited that I discovered this solution, and I hope the information helps if you want to tackle a similar leaded glass or stained glass project in your own home.
P.S. Here’s an impromptu video I made while I was working to give you a better idea of the process while it was in progress (including my noisy baby):

Although you put this up years ago, it inspired me so I saved the link. Now that I am ready to do my windows I realize I have questions.
First of all, you did an amazing job on the windows, they look fabulous. Also, your instructions and video are very helpful. Thank you!
My question is about the privacy aspect. I want to do this because I have some snoopy neighbors and I don’t feel comfortable with them peering in my windows. My question is whether the clear Gallery Glass swirled obscures the view of the inside of the house from the outside? To do that, do I need to use more paint? Or will it provide privacy if I mix it with the frosted color?
You did such a nice window, I’d love to get your opinion. Thank you.
Can this technique be used in humid environments such as bathrooms or will the steam cause it to peel off?
It can, but the paint will become cloudy temporarily as it absorbs the moisture. Also, in my experience, repeatedly undergoing that cycle weakens the paint a bit and it becomes brittle. There are some great privacy windows films available at places at Lowes and Home Depot that look like traditional leaded glass–better options than were available when I undertook this project.
The previous owner of my house did this to so many windows, that I’d like to remove a few. The “leaded” part is raised and they’re colored and frosted area. Is that like the product you used?How do I remove ?
It it is Gallery Glass, you can use a utility knife to carefully cut around the edges of the design and then peel it off the glass.